Difference between revisions of "IPhone"
Ozispadmin (talk | contribs) |
Ozispadmin (talk | contribs) |
||
| Line 16: | Line 16: | ||
---- | ---- | ||
== Step 6 == | == Step 6 == | ||
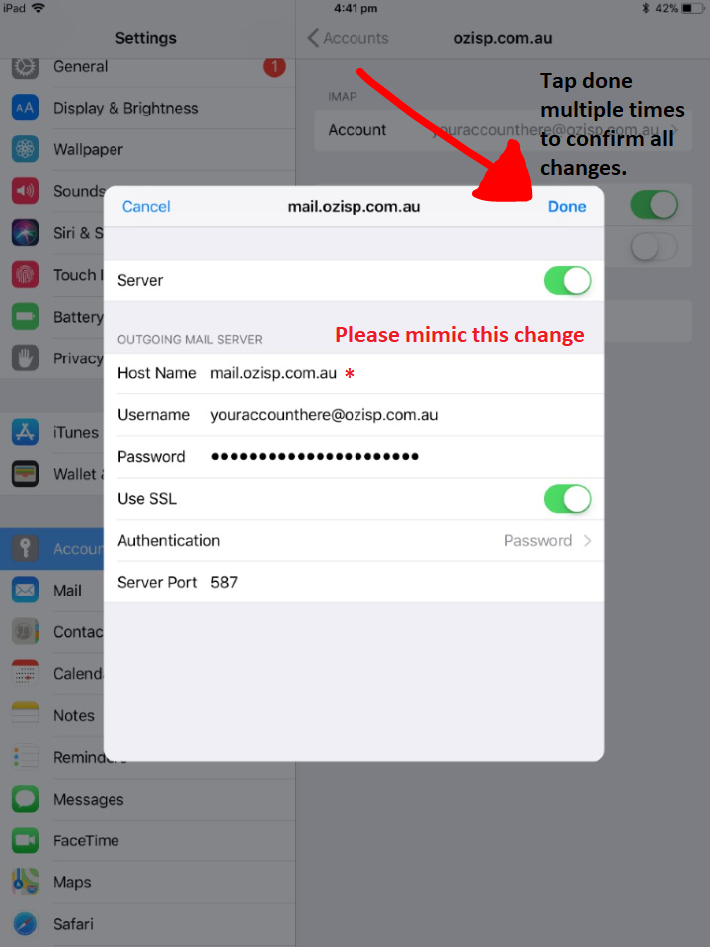
| − | [[File:IPhone_Step_6_2.PNG]]<br/><br/>Please confirm that the host name says 'mail.ozisp.com.au' or 'mail.wimmera.com.au'. Both are correct. '''Tap 'Done' and 'Done' again. [VERY IMPORTANT]''' | + | [[File:IPhone_Step_6_2.PNG]]<br/><br/>Please confirm that the host name says 'mail.ozisp.com.au' or 'mail.wimmera.com.au'. Both are correct. '''Tap 'Done' and 'Done' again. [VERY IMPORTANT]'''<br/><br/> [[Internal Use: Authentication Setting]] |
---- | ---- | ||
== Step 7 == | == Step 7 == | ||
Latest revision as of 10:31, 12 January 2018
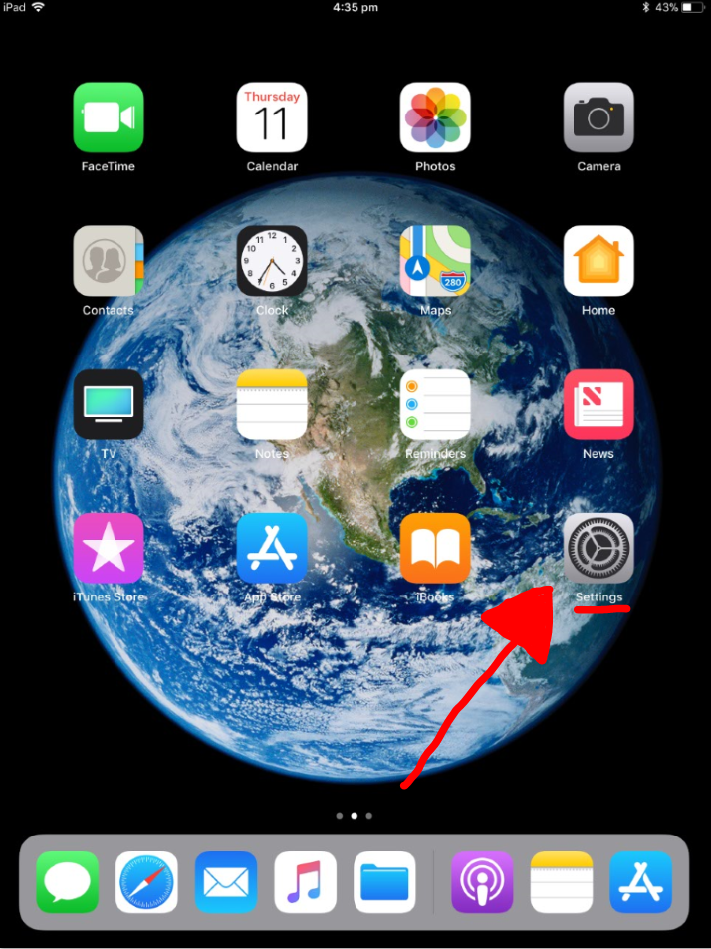
Step 1
Go to 'Settings' on your Home screen.
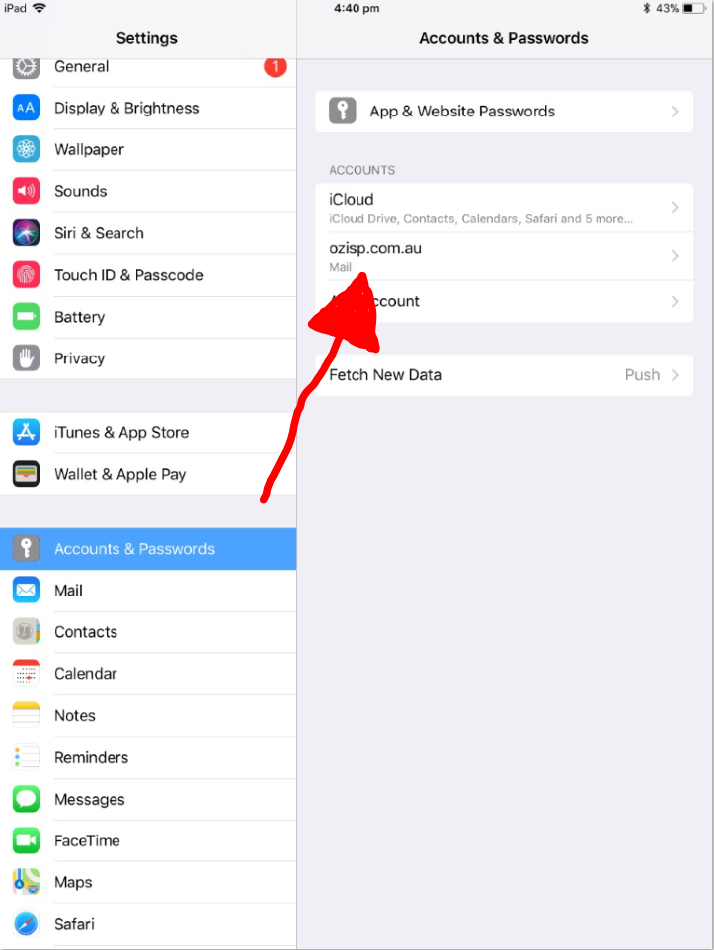
Step 2
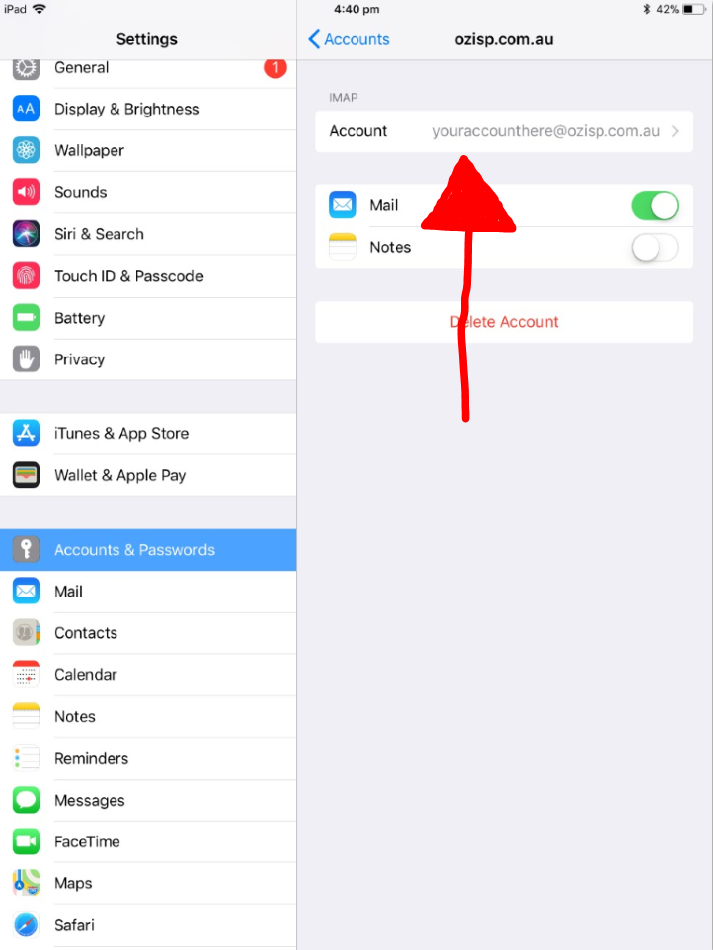
Step 3
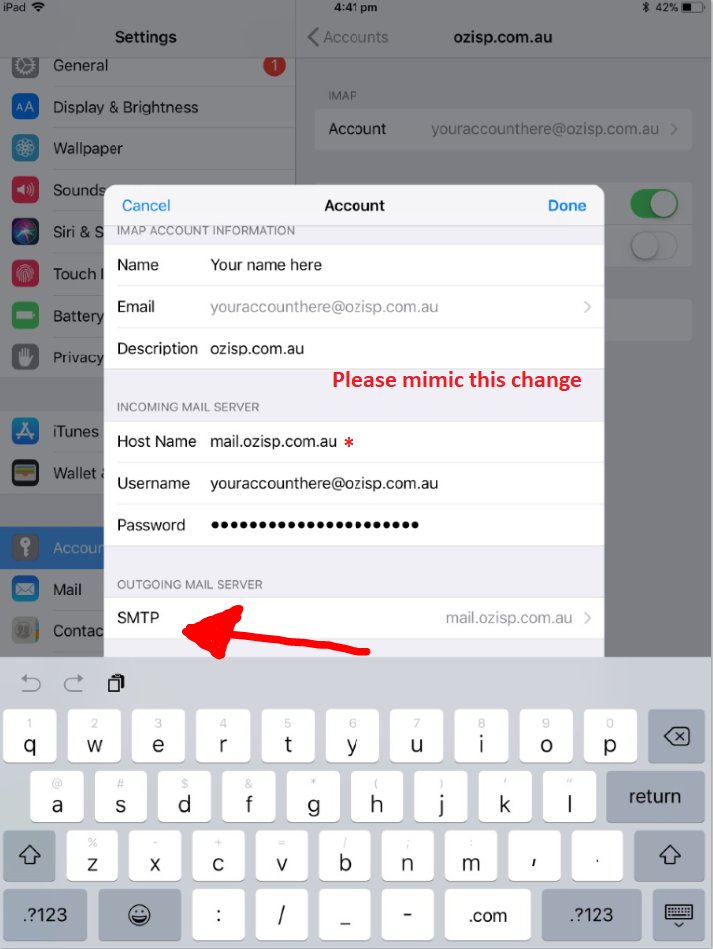
Step 4
Please make sure that the host name says 'mail.ozisp.com.au' or 'mail.wimmera.com.au'. Both are correct.
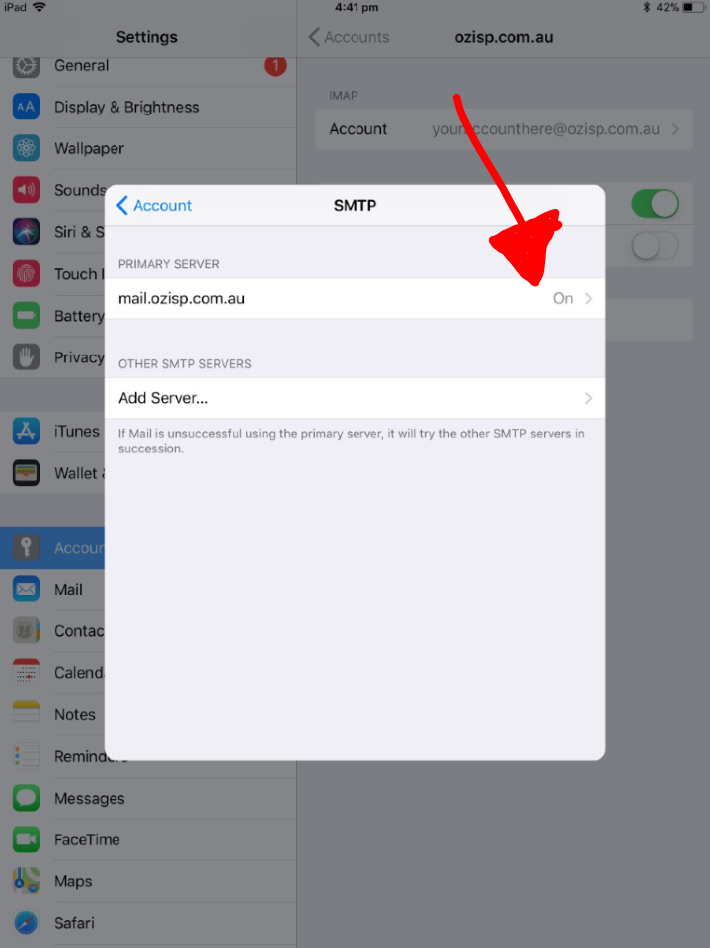
Tap SMTP at the bottom of the page.
Step 5
Tap the option that says 'On >'
Step 6
Please confirm that the host name says 'mail.ozisp.com.au' or 'mail.wimmera.com.au'. Both are correct. Tap 'Done' and 'Done' again. [VERY IMPORTANT]
Internal Use: Authentication Setting
Step 7
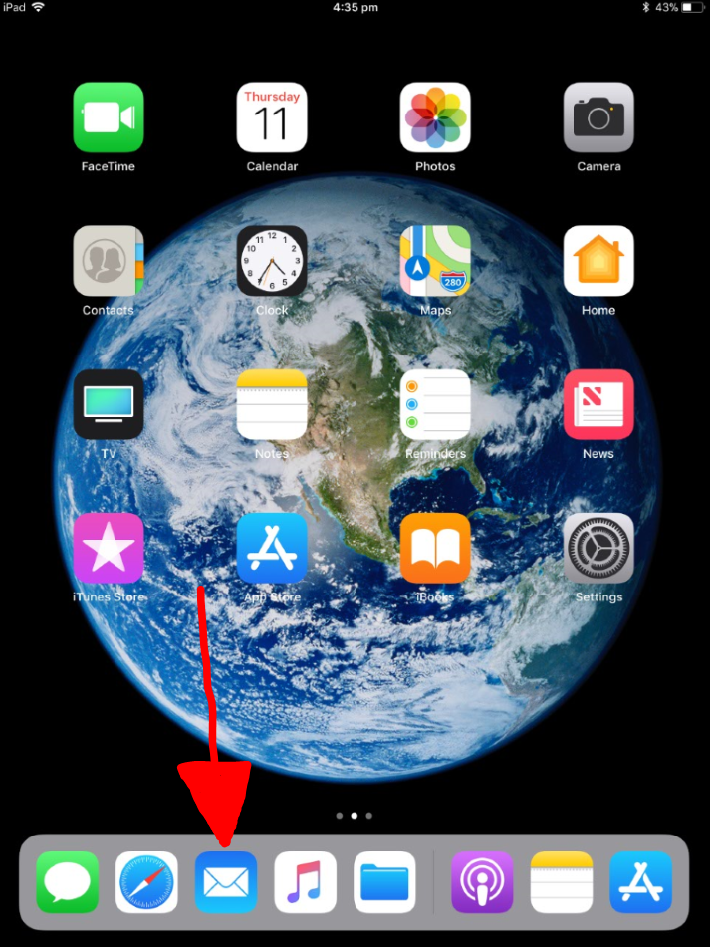
Go back to your home screen and tap 'Mail'.
Step 8
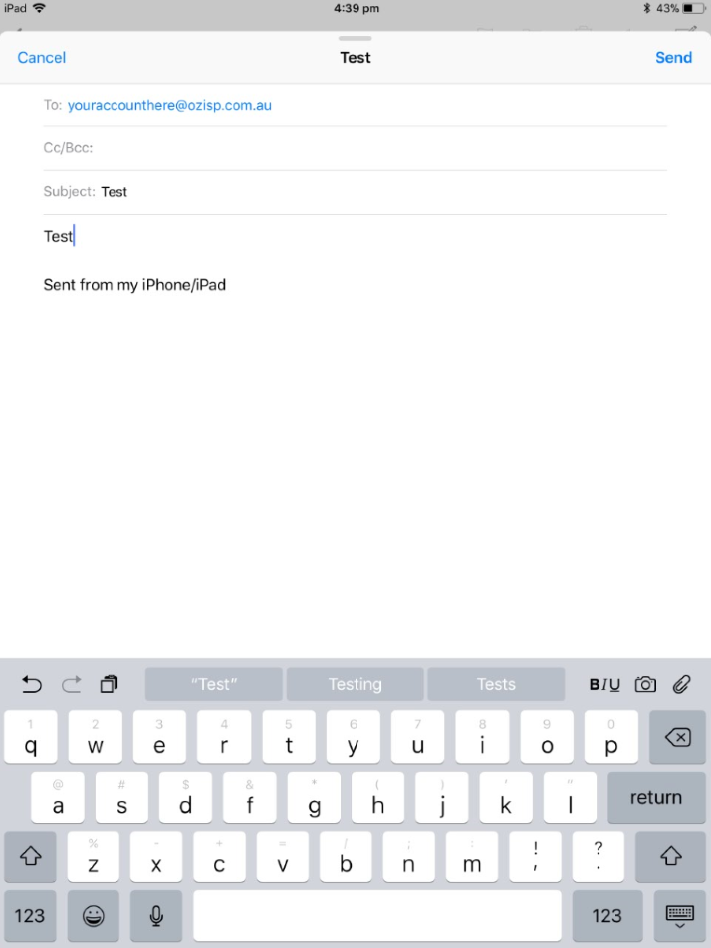
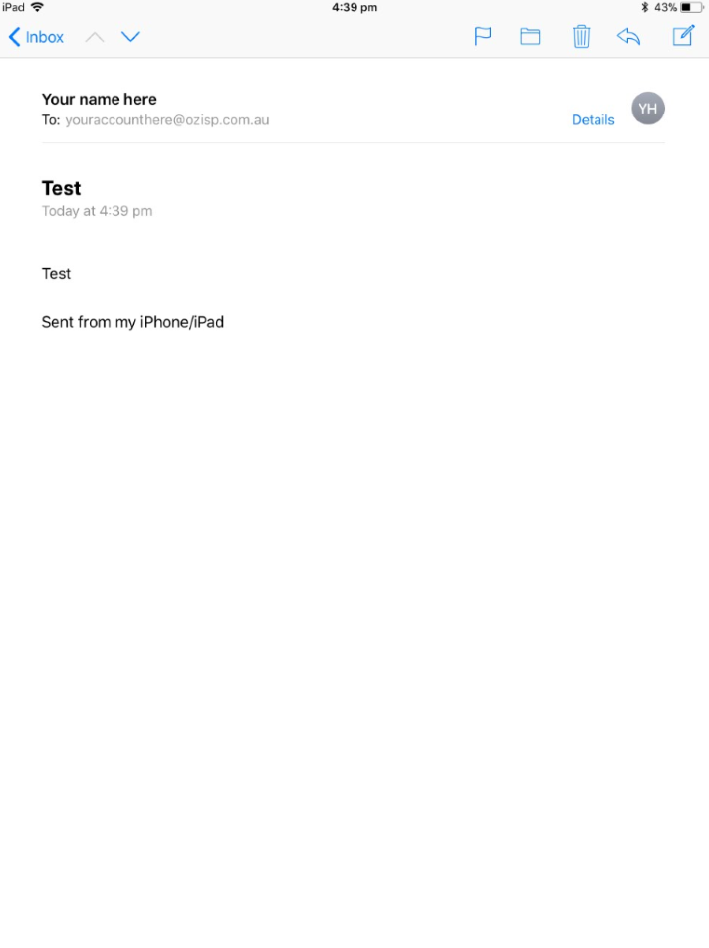
Type and email to yourself and hit send.
Step 9
You should see your email come up in the list to confirm that you have now configured your mail correctly.
