Android
Contents
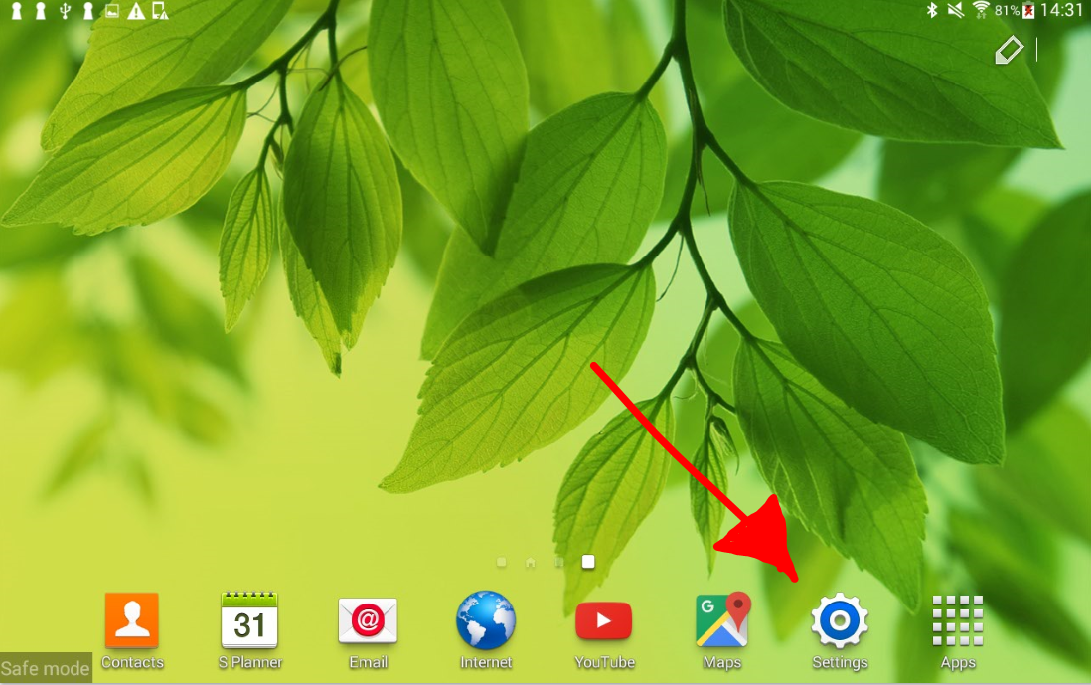
Step 1
Go to 'Settings' on your Home screen.
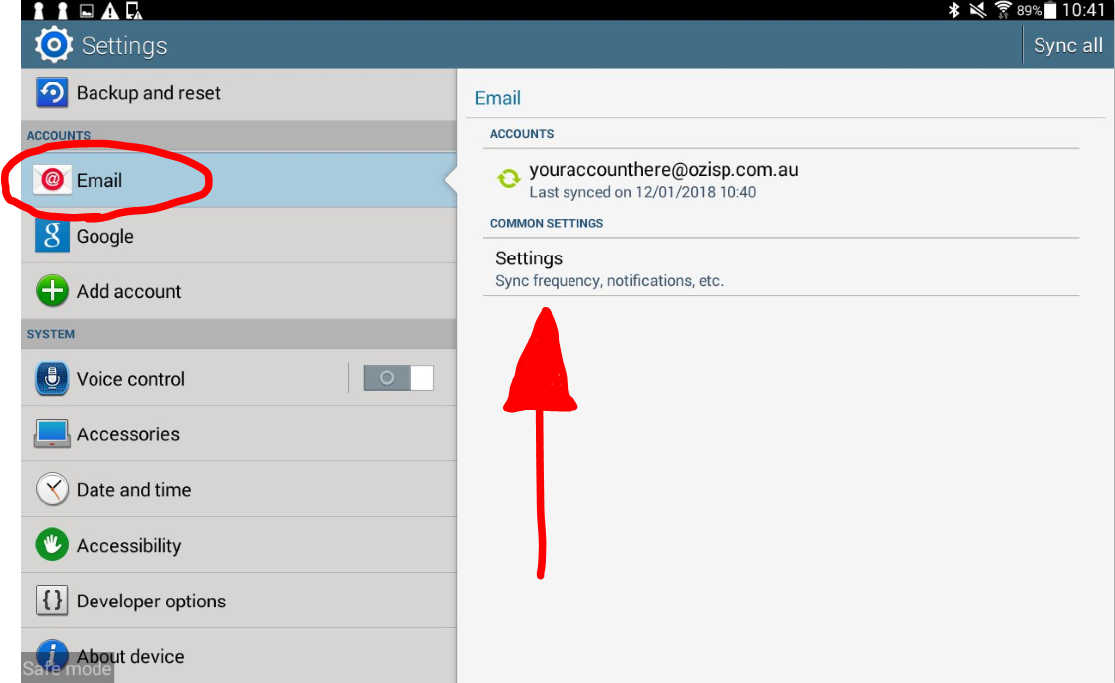
Step 2
Tap on 'Settings' under your option for Email.
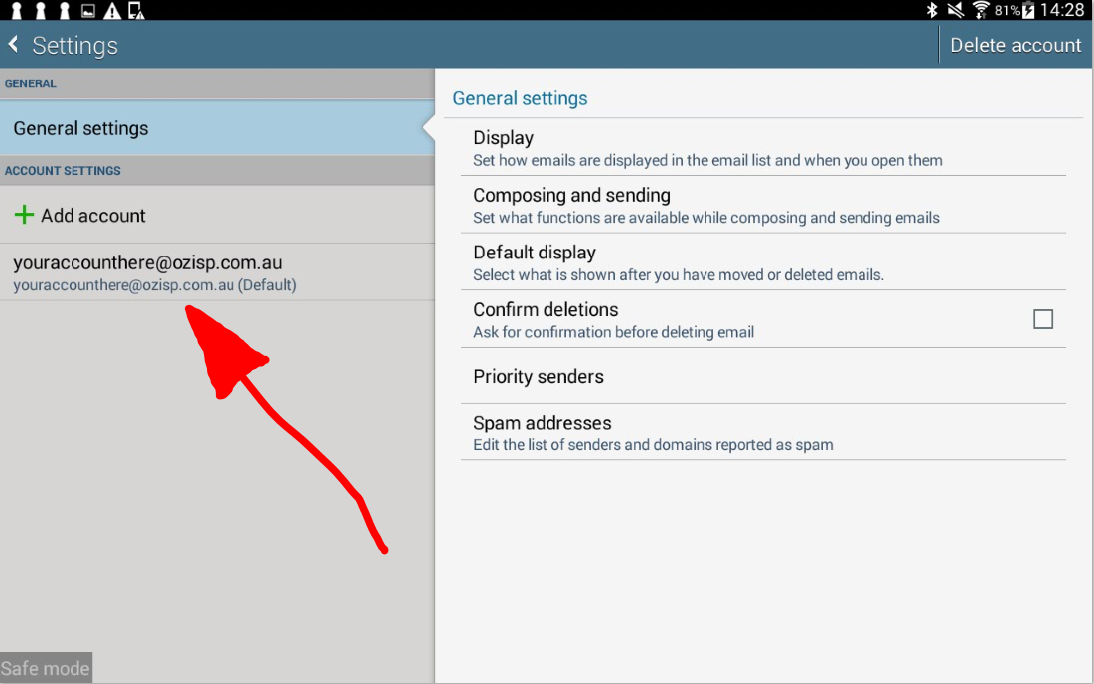
Step 3
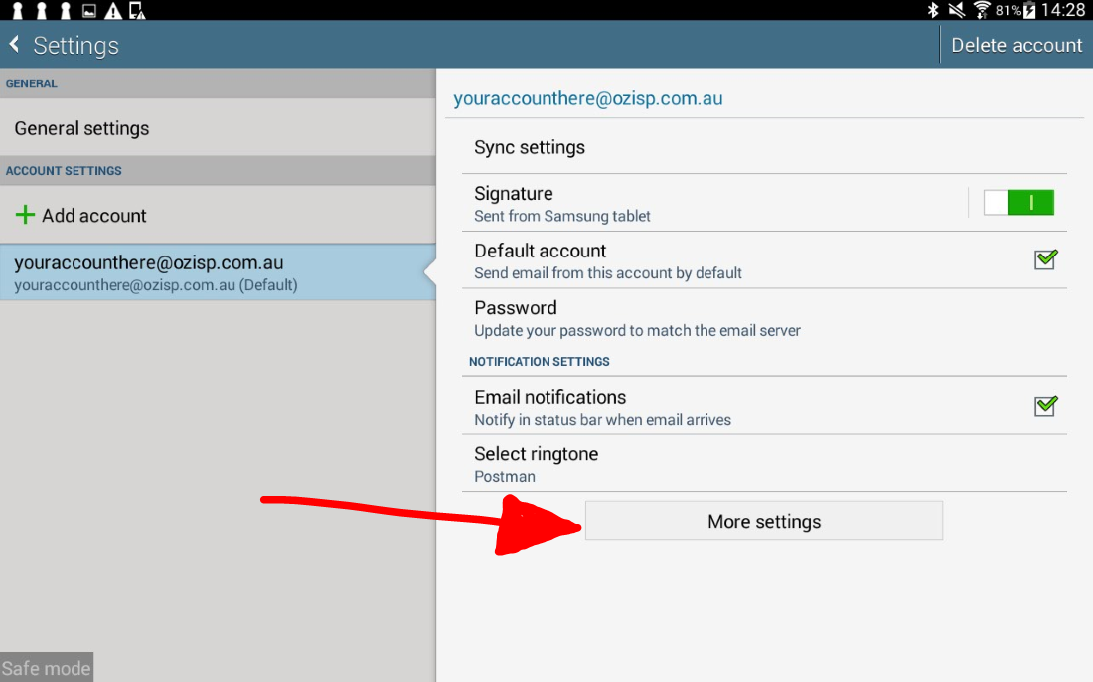
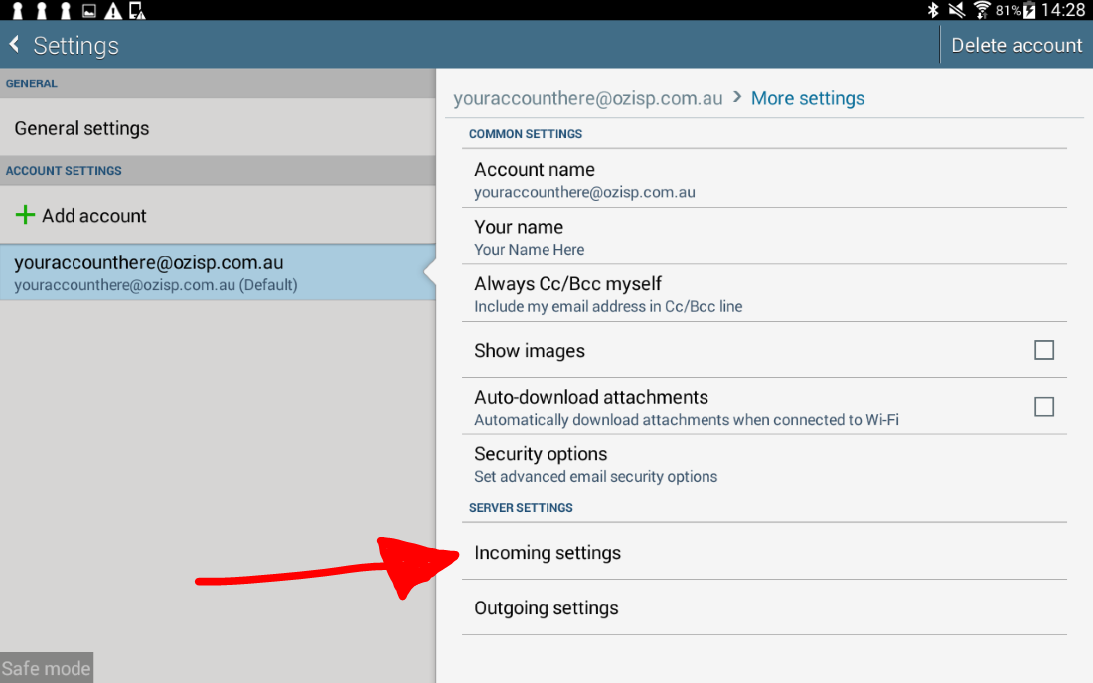
Step 4
Step 5
Step 6
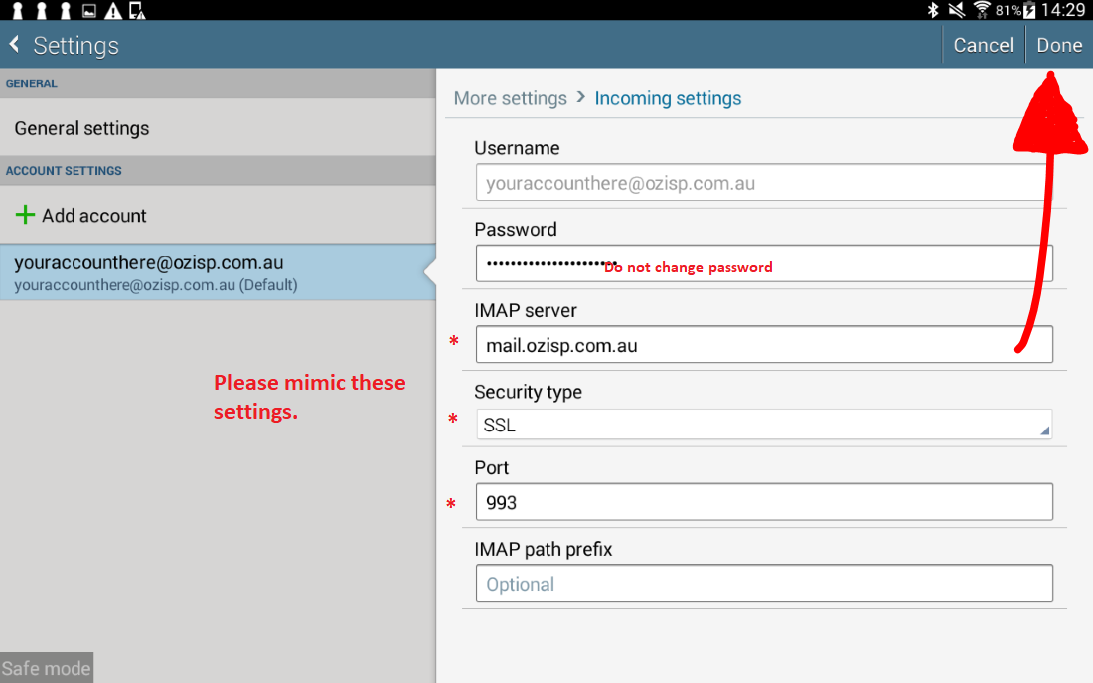
Please confirm that the IMAP Server (or POP3 Server which is okay too) says 'mail.ozisp.com.au' or 'mail.wimmera.com.au'. Please also change your security type to SSL and your port to 993. If it says POP3 please change this port to 995 and try again.
Tap 'Done' [VERY IMPORTANT]
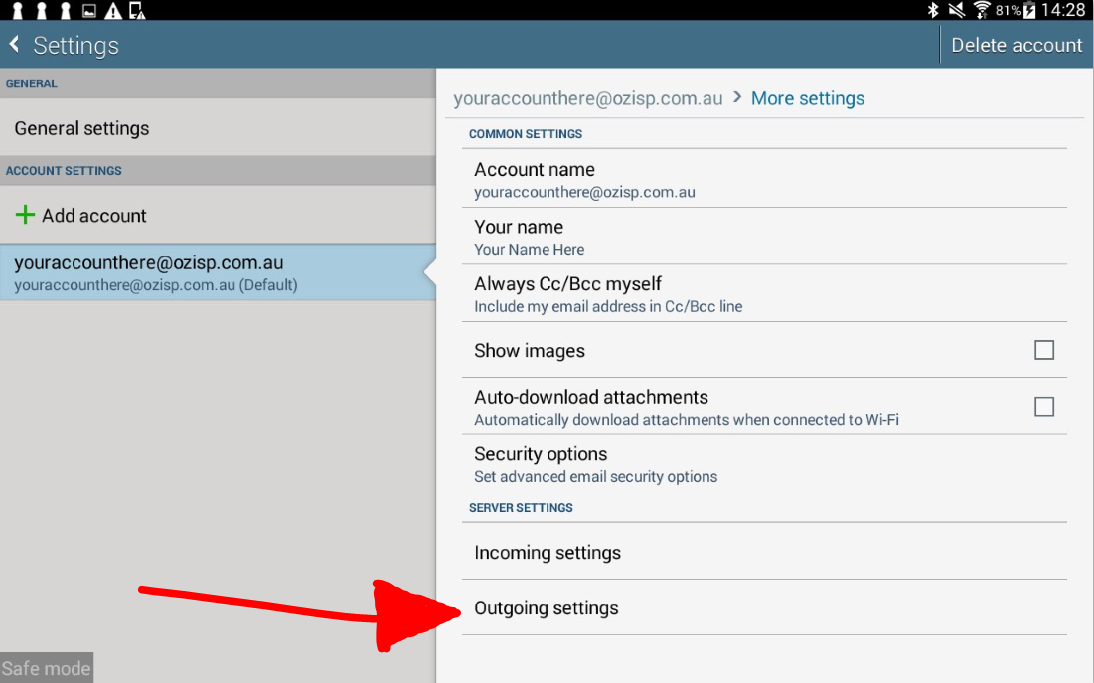
Step 7
Step 8
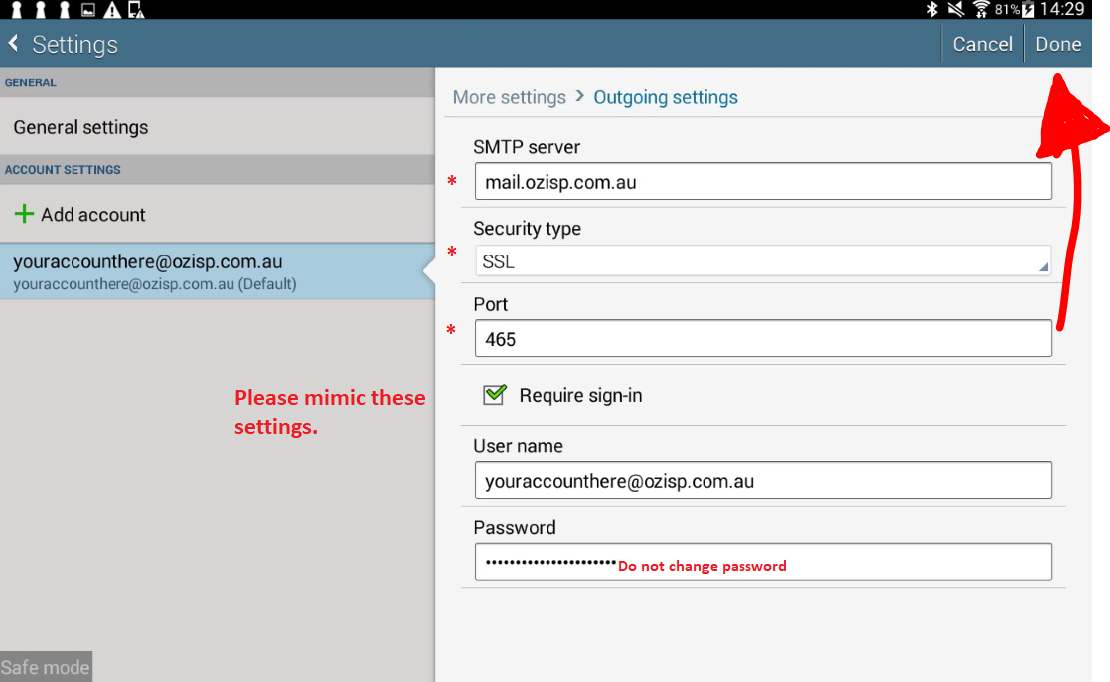
Please confirm that the IMAP Server (or POP3 Server which is okay too) says 'mail.ozisp.com.au' or 'mail.wimmera.com.au'. Please also change your security type to SSL and your port to 465.
Tap 'Done' [VERY IMPORTANT]
Step 9
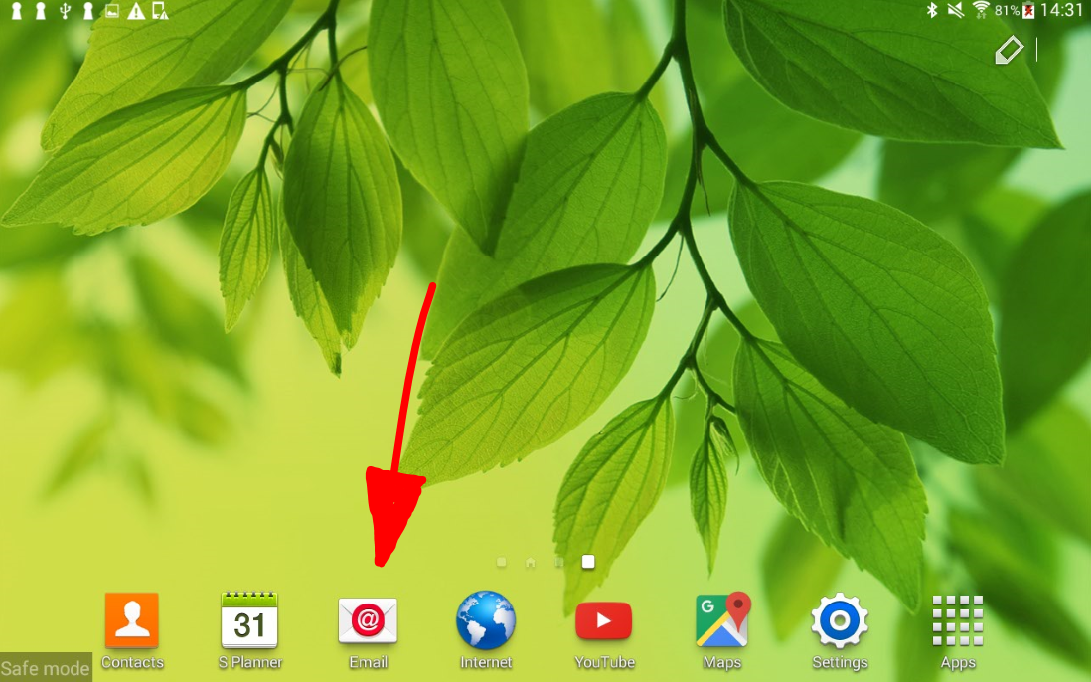
Go back to your home screen and tap 'Email'
Step 10
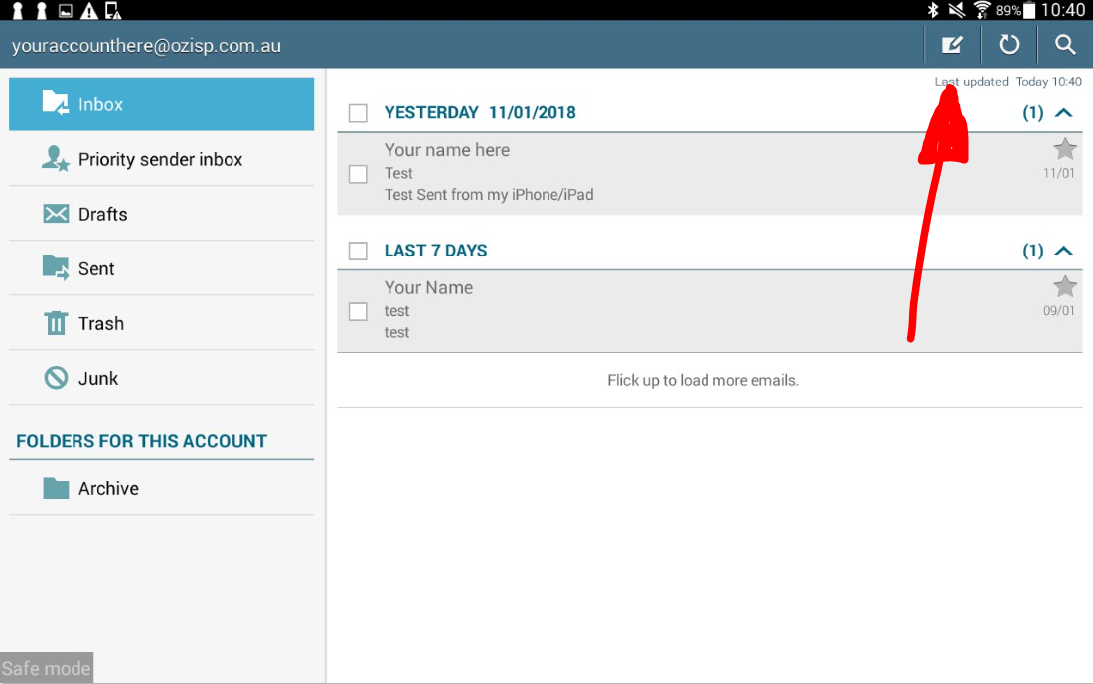
Step 11
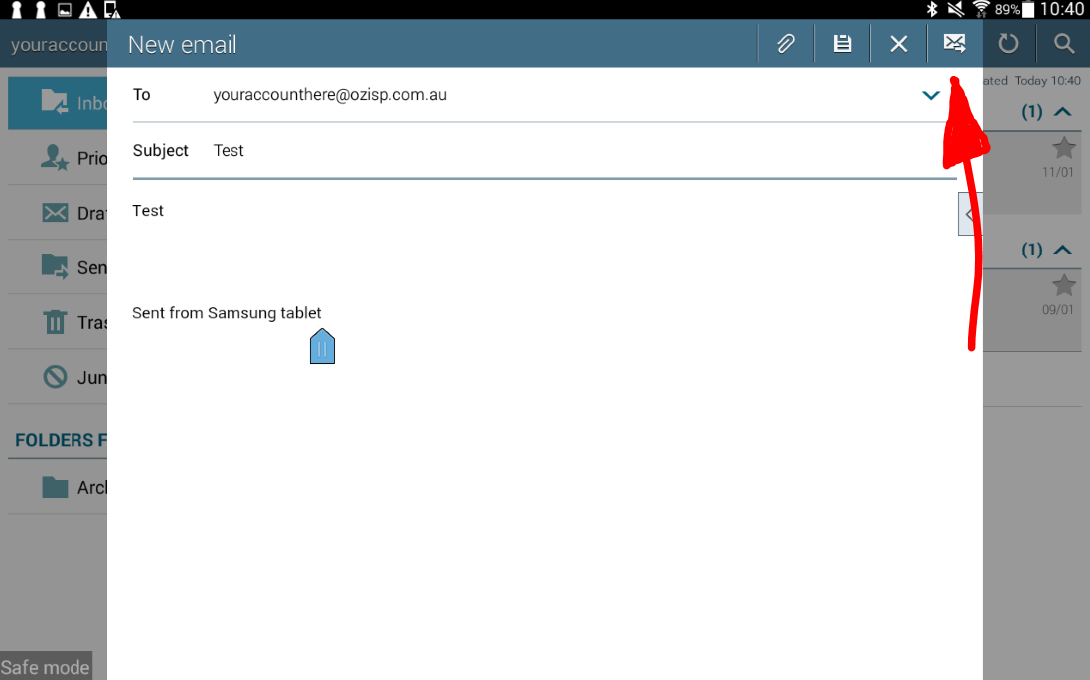
Type your address in the 'To:' field and type test in the Header and Main Body of your email and hit the Send Mail button.
Step 12
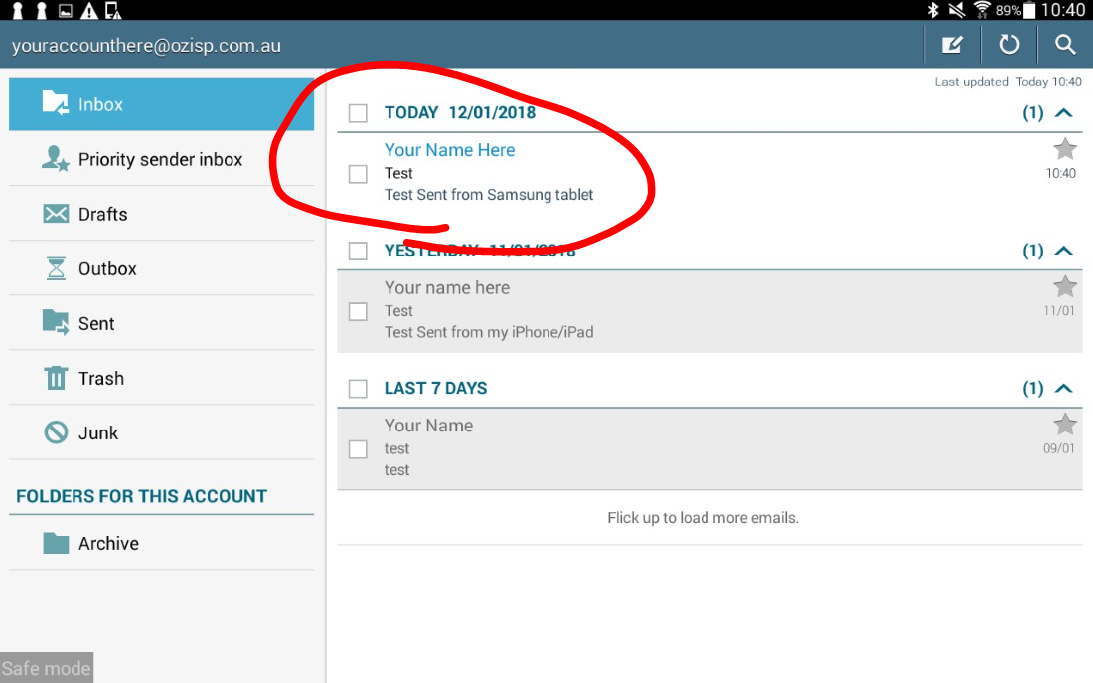
You should see your email come up in the list to confirm that you have now configured your mail correctly.
