Outlook 2016 Setup
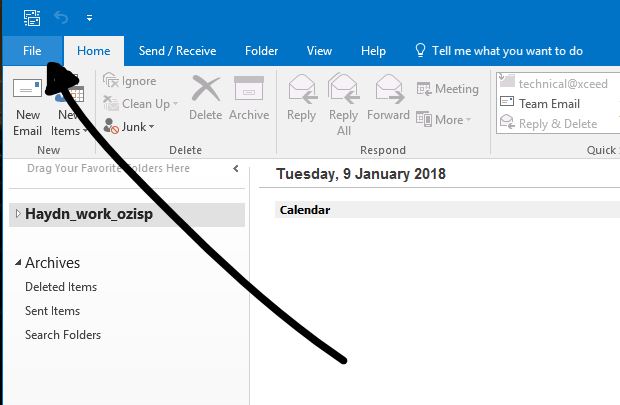
Step 1
Click the 'File' option at the top of your page.
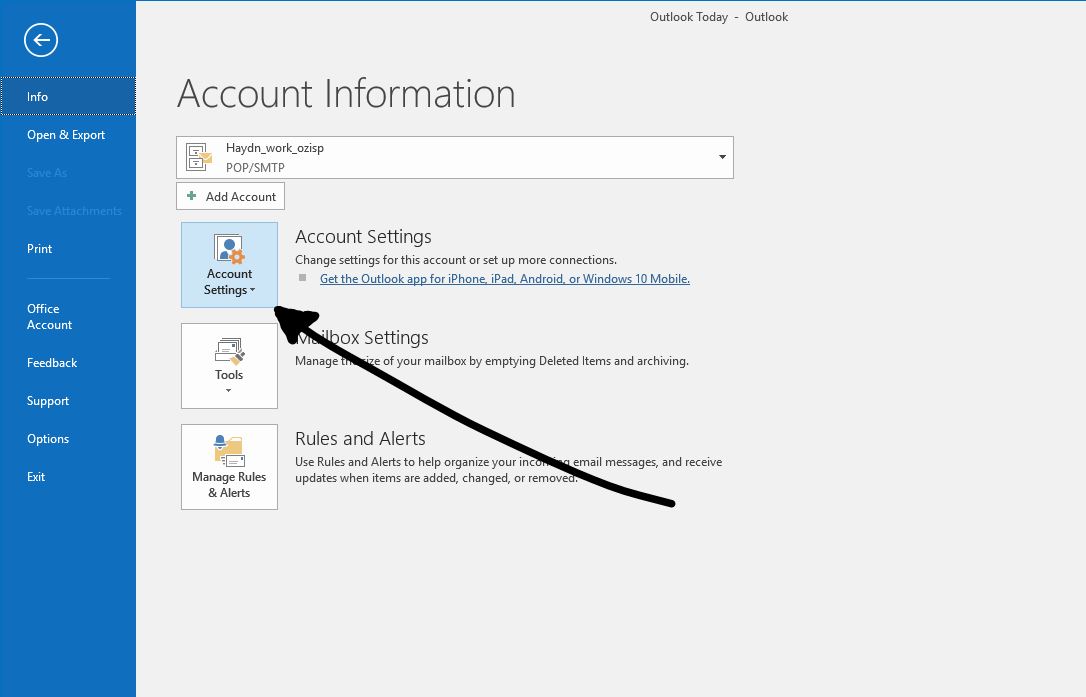
Step 2
Click 'Account Settings' to open your Account menu.
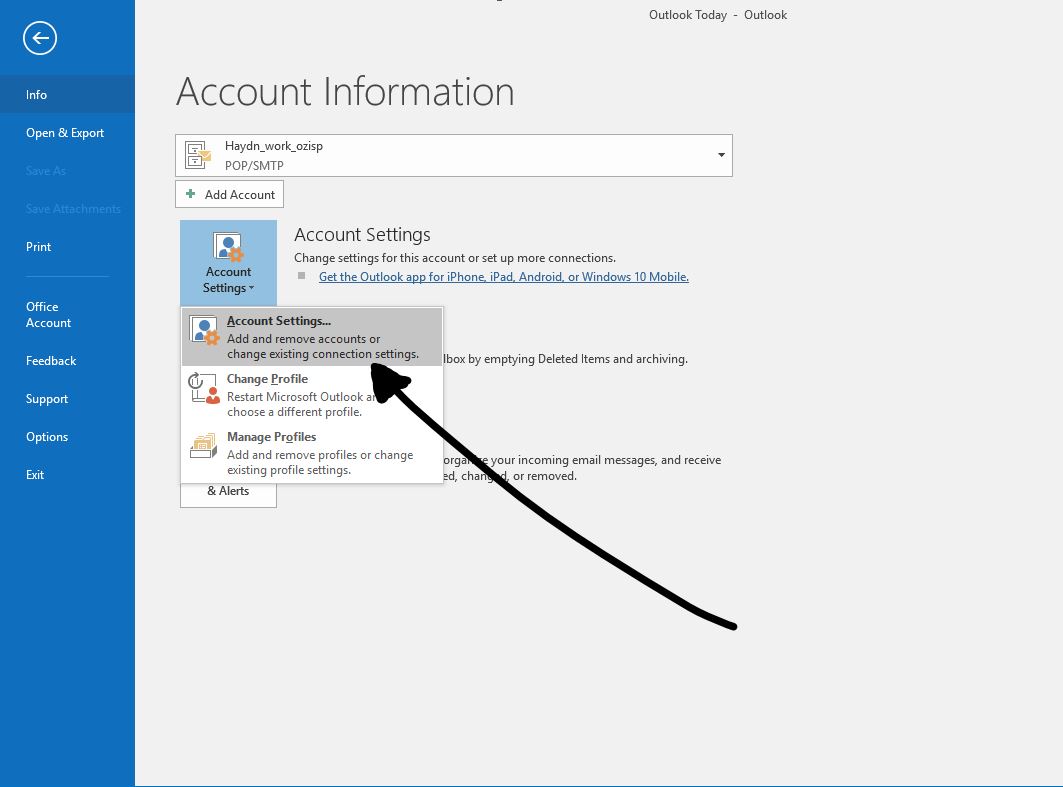
Step 3
Click 'Account Settings' again to open your settings menu.
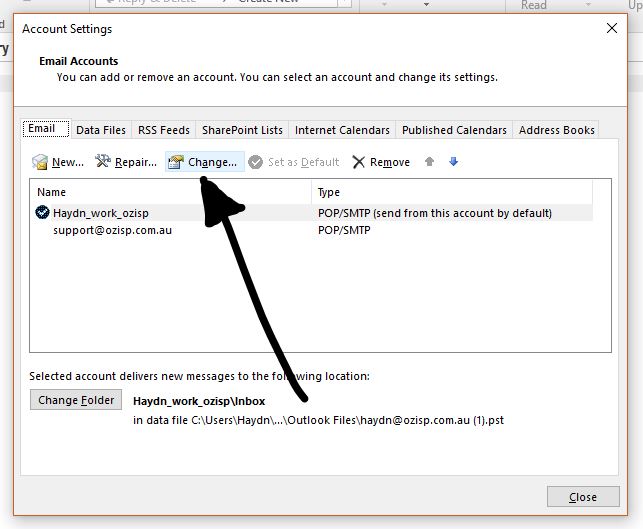
Step 4
Click 'Change...' to change your account to a new setting.
Step 5
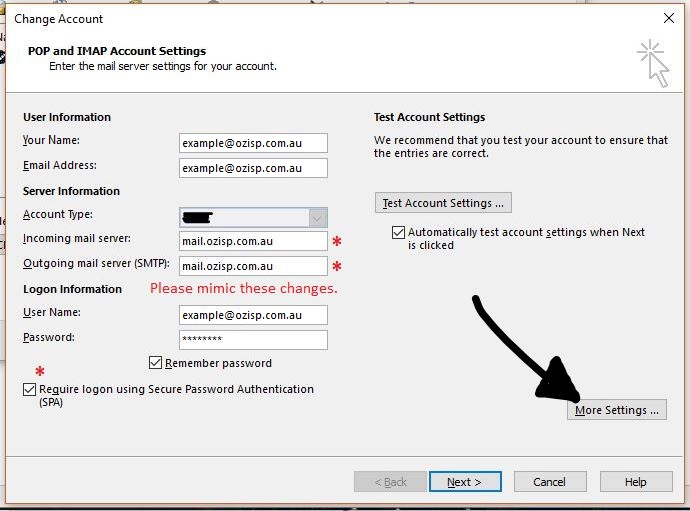
Enter mail.ozisp.com.au or mail.wimmera.com.au in both the incoming and outgoing fields.
Click SPA Authentication.
Then click "More Settings...".
Step 5
File:6 Click Outgoing Server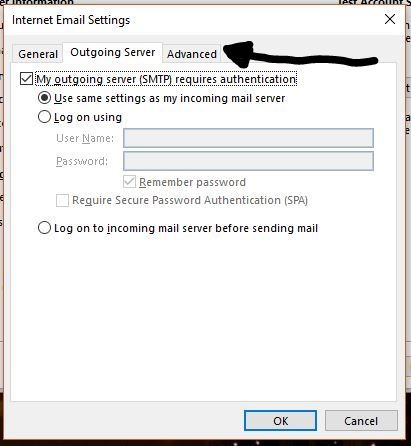
Copy these settings into each tab.
- In your "Outgoing Server" tab make sure the box is checked on.
Next, in your 'Advanced' tab read if you have "IMAP" or "POP3".
- If it says "IMAP" please enter 993 in the box next to it.
- If it says "POP3" enter 995 in the box next to it.
Make sure "This server requires an encrypted connection (SSL)" and "Use the following type of encrypted connection: SSL" is selected in both places in your 'Advanced' tab.
